Mastering Homemade Panipopo Coconut Buns
39 min read Learn to bake soft, glossy panipopo coconut buns with step-by-step techniques, cultural context, and tips for perfect coconut sauce, proofing, and island-inspired serving. October 04, 2025 00:07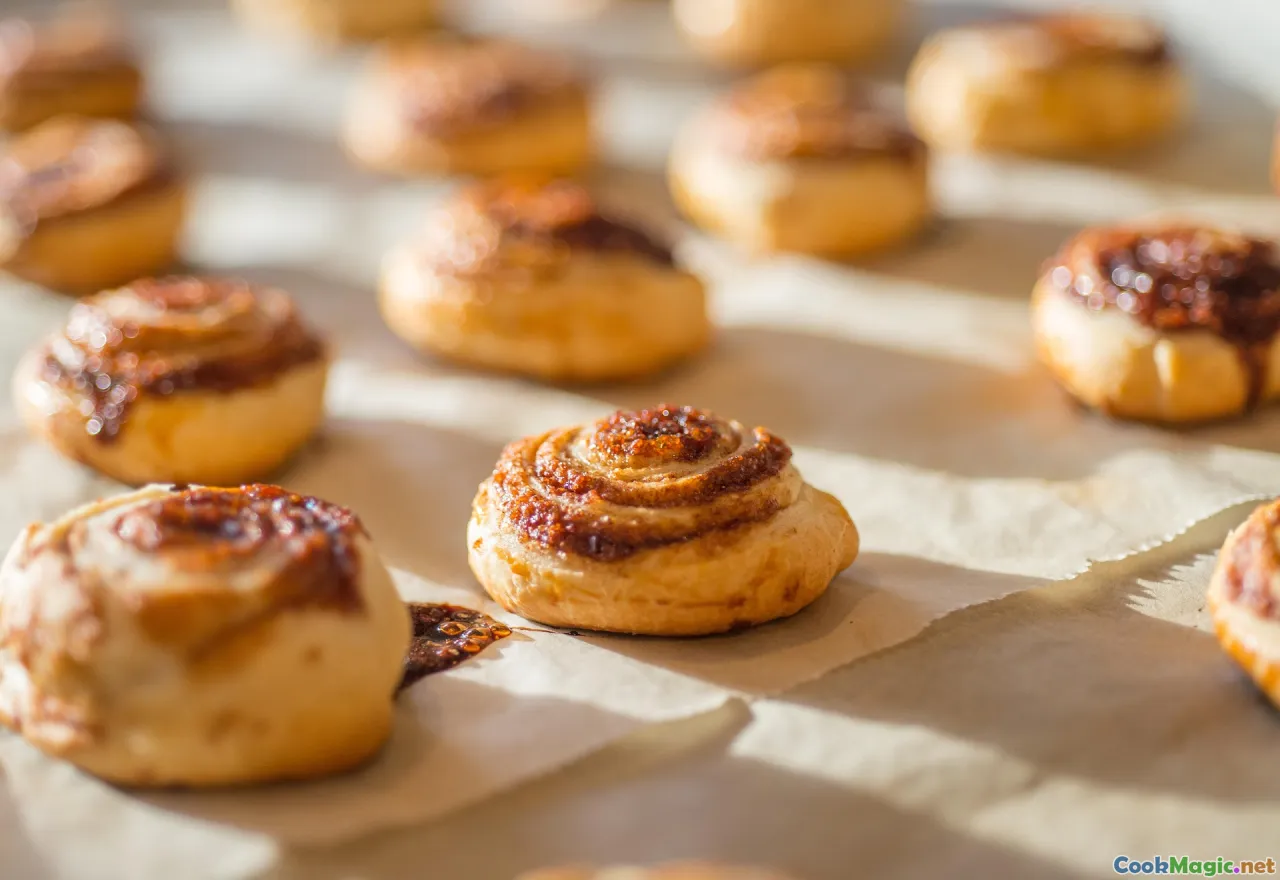
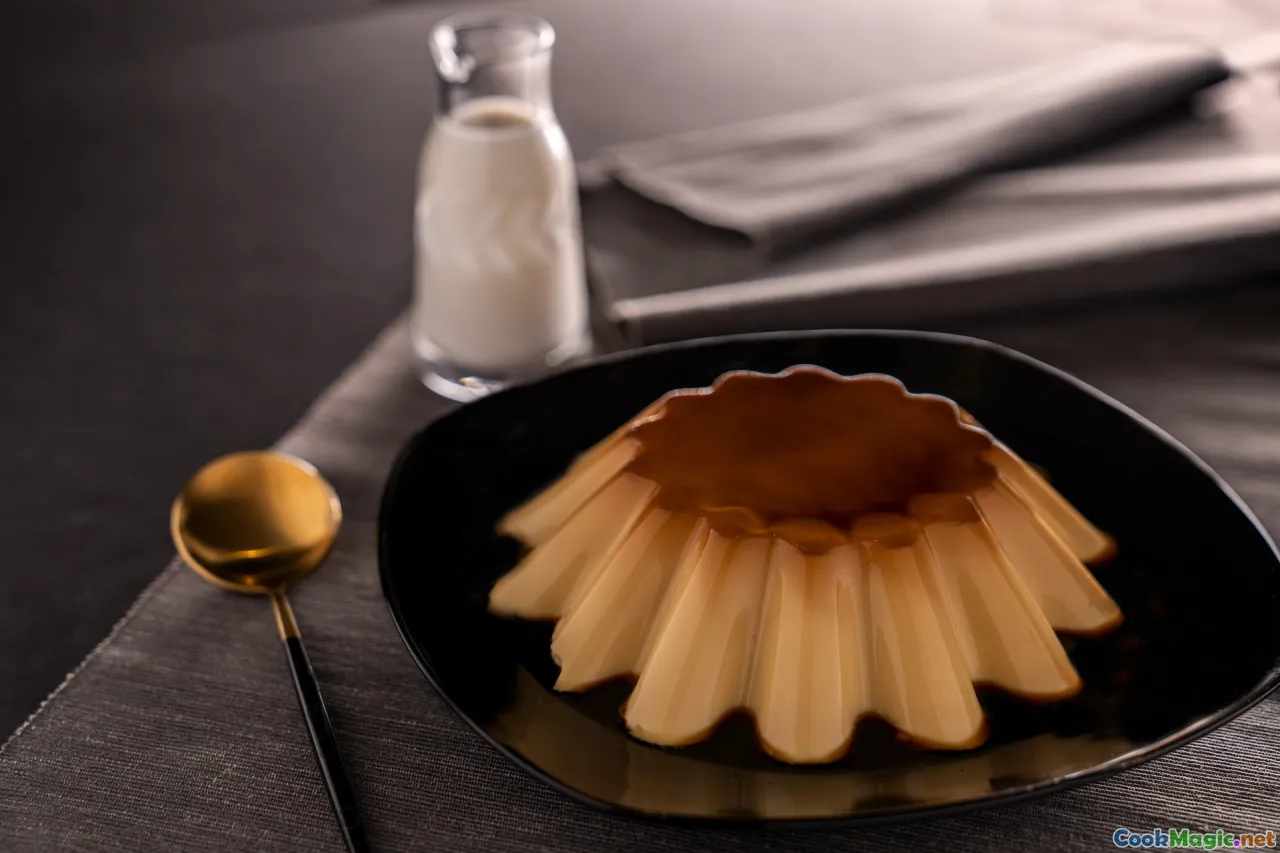
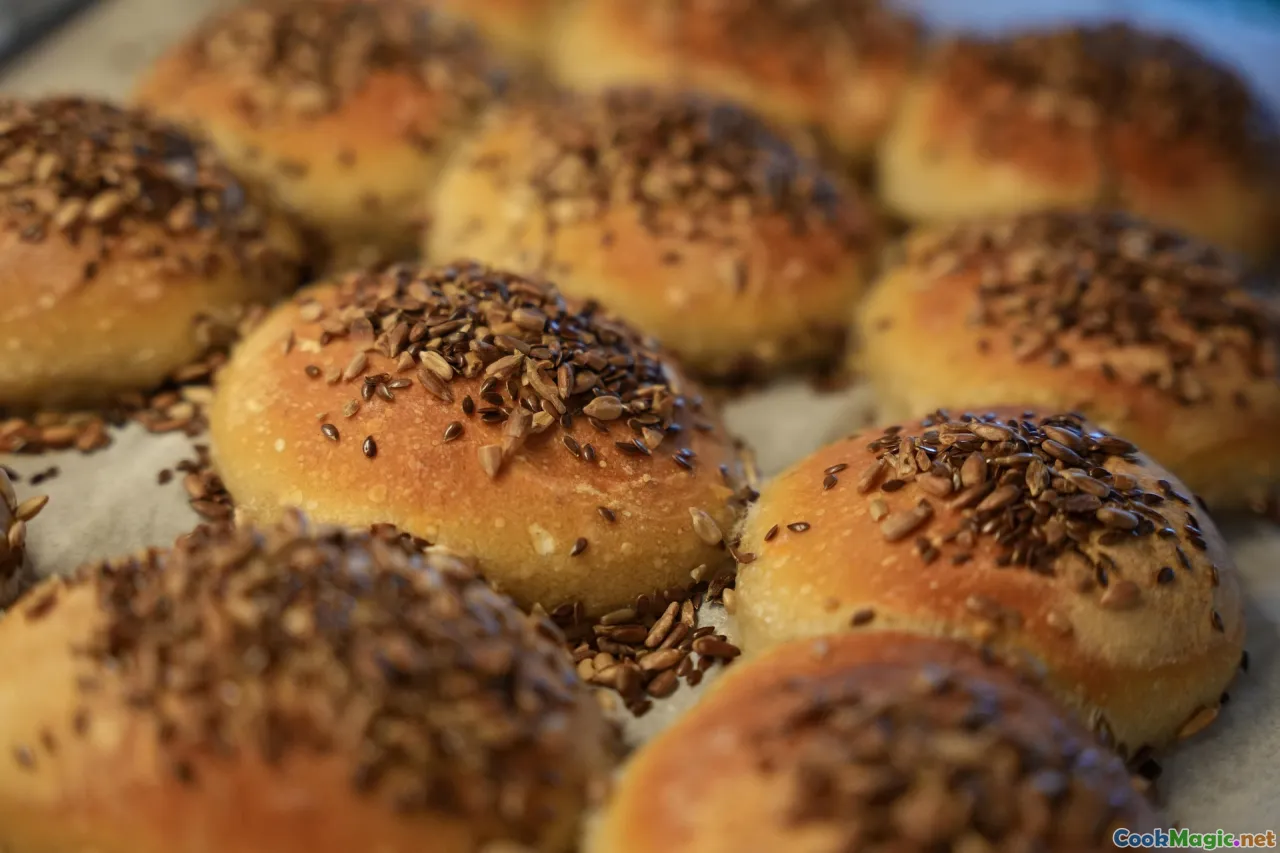
The first time I smelled panipopo baking, the entire house seemed to exhale coconut. It was a humid Sunday in Apia, and aunty had set a metal baking pan on the wooden counter of her open-sided fale. The yeast rolls were still pale and shy, nestled shoulder to shoulder, but the sauce—coconut milk whisked with sugar and a pinch of salt—murmured at the edges. When the pan went into the oven, the room filled with a scent that was warm and tropical and faintly caramel, as if a coconut had decided to become custard. We ate those buns with our fingers, tearing them open so wisps of steam rose from the crumb. The bottoms were soaked and glossy, like a pudding’s surface, yet the tops had that bakery-gold sheen you only get when heat has kissed sugar just long enough. And when the pan scraped empty, aunty’s voice—equal parts pride and affection—summed up the whole thing: Panipopo tastes like home.
What panipopo is, and why it matters

Panipopo—sometimes written pani popo—are Samoan coconut buns: soft, slightly sweet yeast rolls baked in a shallow bath of sweetened coconut milk. The sauce thickens as it bakes, slicking the undersides of the buns and seeping into every crevice. The top crust browns gently while the bottoms turn custardy, so each bite gives you two textures: pillowy bread and velvety coconut cream.
This is Sunday food, to’ona’i food, celebration food. It shows up on family tables beside bowls of oka i’a (citrus-cured fish), platters of sapasui (Samoan chop suey), wedges of roasted ulu (breadfruit), and leaves of palusami glistening with coconut cream. It travels, too—across oceans and generations—into church halls in South Auckland, family get-togethers in Utah, graduation parties in Hawai‘i, and every kitchen that’s ever had someone whisper, Should we make panipopo?
Culturally, panipopo reflects a delicious truth: culinary traditions adapt. Wheat flour and yeast arrived with traders and missionaries; coconut has always been here. The two met in a baking pan and made something that tastes like a hug.
A brief history you can taste

Bread is not indigenous to Samoa. Root crops—taro, breadfruit, cassava—are. So are coconuts, with their endless uses: water to drink, meat to eat, fat to cook, fibers to weave. When wheat flour, sugar, and metal baking pans began to flow into the Pacific in the 19th century, people folded those ingredients into existing knowledge. The Samoan umu, the earth oven of hot stones, will roast a pig to bronze, bake breadfruit until it sighs, and steam palusami until it quivers. Panipopo adapted to both the umu and the modern oven. In metal pans lined with banana leaves, you can bake buns in an umu—rolling heat, smoky perfume, and a sauce enriched with first-press coconut cream. In electric ovens, you get the reliable top-brown and a more controlled simmer in the sauce.
Walk through Apia’s Fugalei Market on a late Saturday afternoon, and you can smell the practical future of Sunday: cassava packed in woven baskets, taro bound in clean bundles, young coconuts, bananas, and the occasional covered tray from someone’s home oven. In Salelologa on Savai’i, after the ferry exhales its passengers into the market, it’s not unusual to catch the scent of coconut and yeast near bakery stalls. And far from Samoa, panipopo has become a calling card of the diaspora: church bake sales in Mangere, family reunions in San Diego, or a potluck table where the first empty pan is always the one that once held the coconut buns.
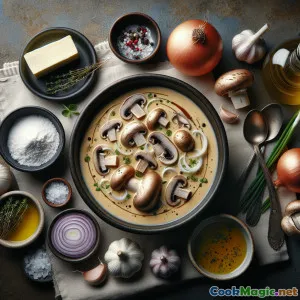
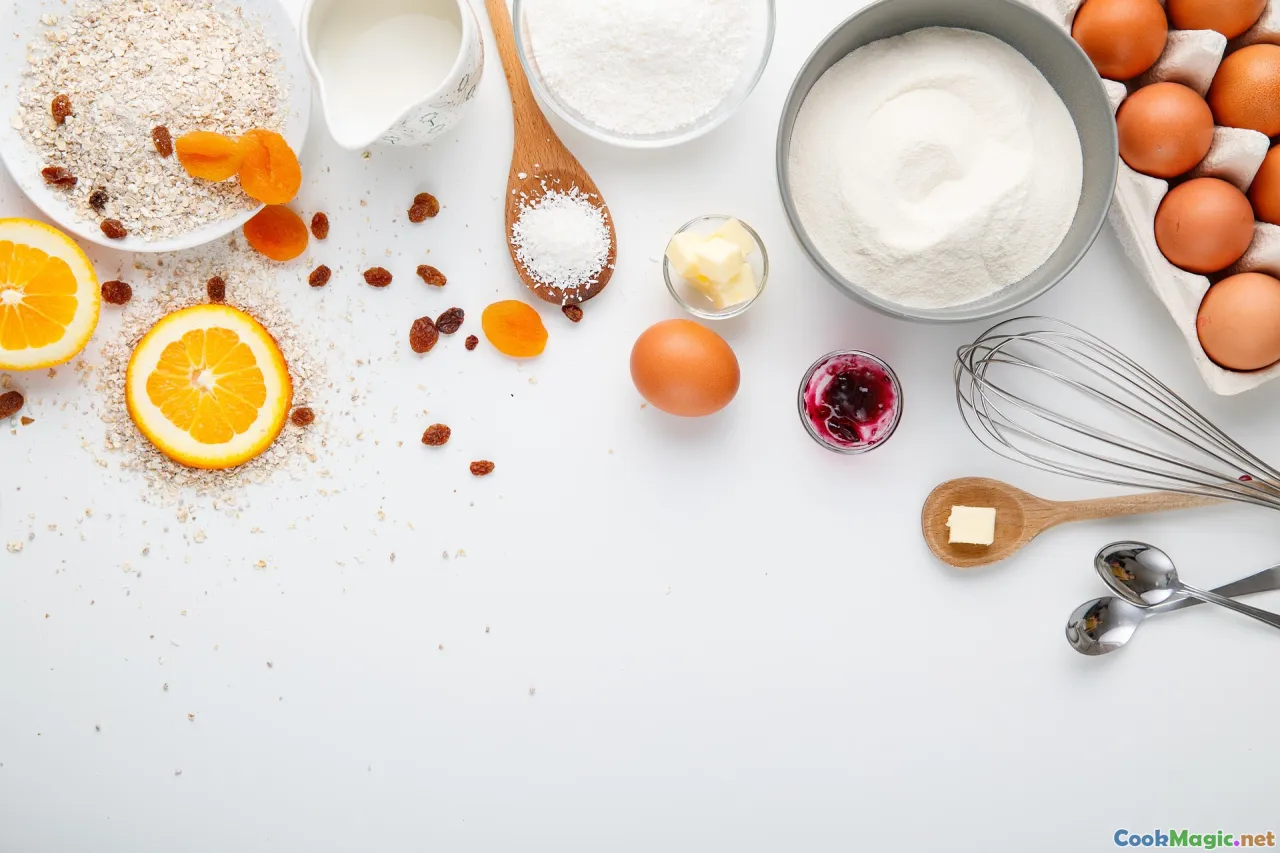
Ingredient deep dive: coconut, flour, sweetness, and salt
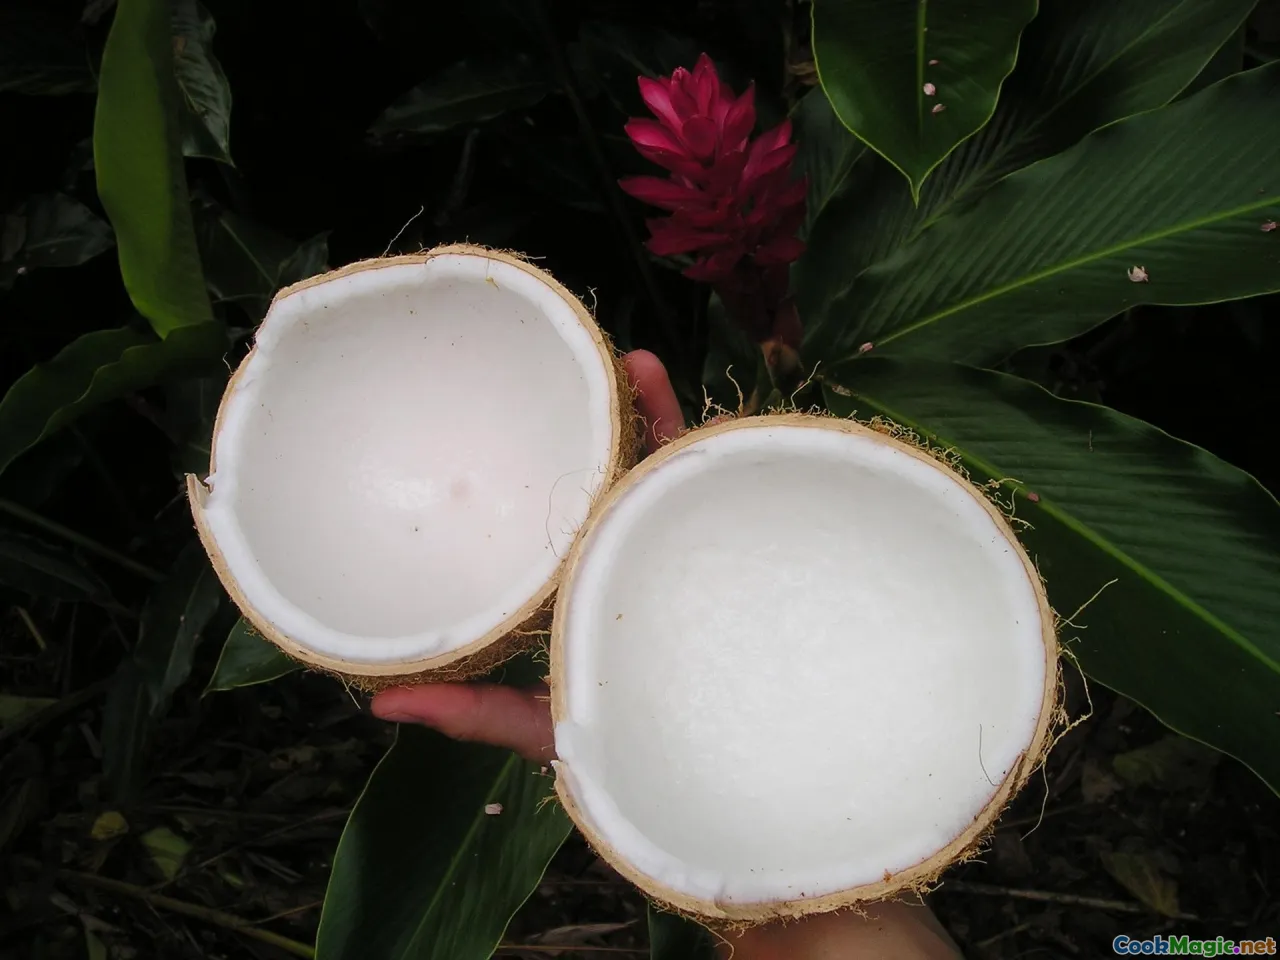
- Coconut milk or cream: Use full-fat canned coconut milk for consistency. If you can get fresh coconut cream squeezed from grated coconut, use that first-press richness for the sauce. In Samoan kitchens you’ll hear different words—pe’epe’e or sua popo for coconut cream. Whatever you call it, you want it lush. Avoid light coconut milk; the sauce will be thin and less silky. If your coconut milk separates in the can, whisk the cream and water back together before measuring.
- Flour: All-purpose flour works well, but a blend of mostly all-purpose with a little bread flour (say, 15–20%) gives more elasticity and bounce. Soft rolls benefit from a moderate protein content—a sturdy dough that still yields tender crumb.
- Sugar: White granulated sugar keeps flavors clean and predictable. Brown sugar adds molasses notes and a deeper caramel color. Many diaspora recipes use sweetened condensed milk in the sauce for extra gloss and sweetness; the flavor tilts more toward a dessert pudding if you go that route.
- Yeast: Instant yeast is straightforward. If you prefer active dry, bloom it in warm liquid first. Sourdough starter can work, but give yourself extra time and a test bake before a big event.
- Fat: Butter yields that plush, bakery-crumb texture and buttery aroma. Coconut oil is a fragrant alternative that leans into the coconut theme. Some cooks use a mix—coconut oil in the dough, butter brushed on the tops—for the best of both worlds.
- Milk vs water in the dough: A little milk enriches; water keeps the crumb light. Coconut milk in the dough is an option, but too much fat can inhibit gluten development. If you add coconut milk to the dough, keep it to a small portion and replace the rest with water or dairy milk.
- Salt: Essential. Too little and the buns taste flat; too much and you blunt the coconut’s bloom. A tiny pinch of salt in the sauce makes the coconut taste more coconutty.
- Aromatics: Vanilla is classic in many home kitchens. Some aunties add a whisper of almond extract. You may also see threads of grated coconut in the sauce or a little cardamom sprinkled through the dough—less traditional, but lovely.
How to make panipopo at home: a step-by-step you can trust

This recipe is for a 9 x 13-inch (23 x 33 cm) pan—twelve buns snugly nestled. The method yields soft, resilient rolls that drink in the coconut sauce without collapsing.
Yield: 12 buns Total time: 3 to 4 hours (mostly rising and baking)
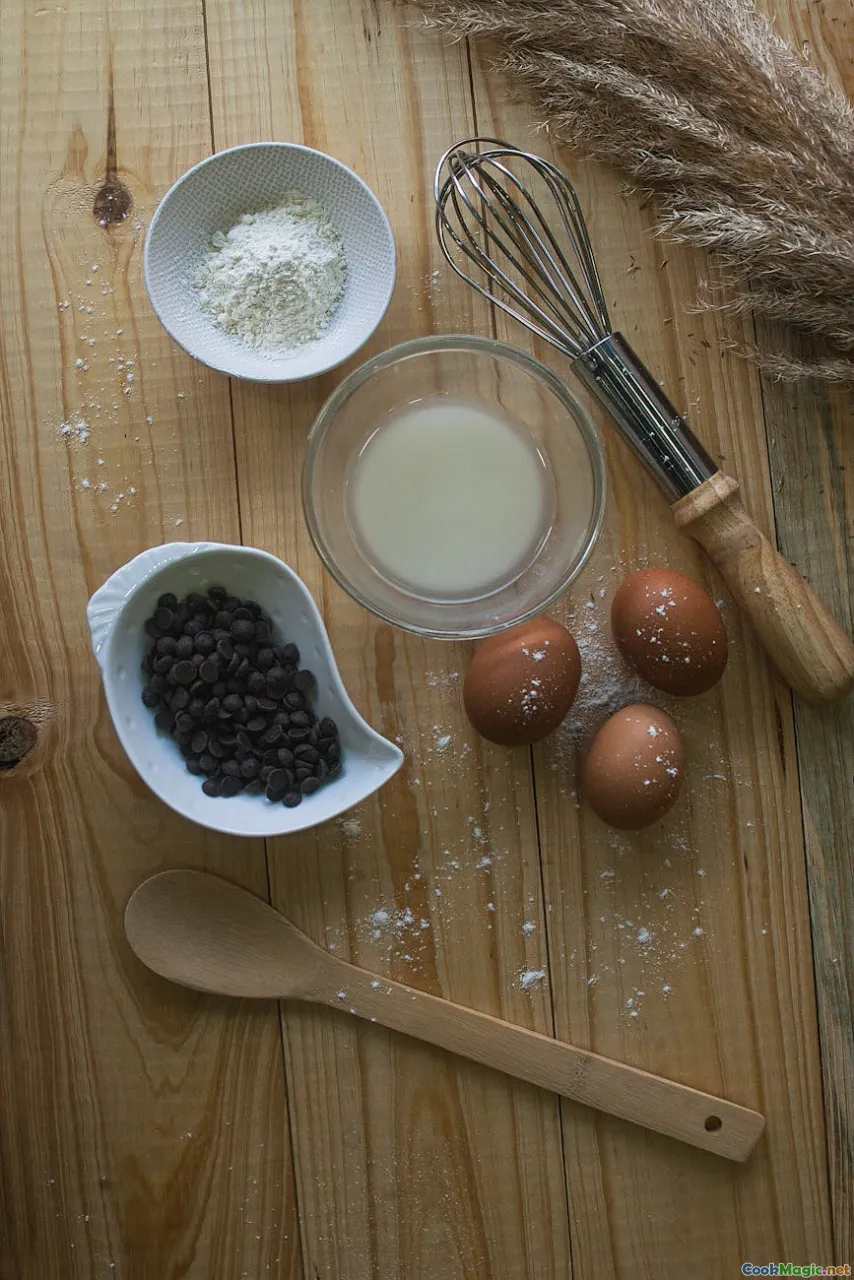
Dough ingredients:
- 360 g all-purpose flour (about 3 cups), plus extra for dusting
- 60 g bread flour (about 1/2 cup) — optional but recommended for structure
- 7 g instant yeast (2 1/4 tsp)
- 50 g sugar (1/4 cup)
- 6 g fine salt (1 tsp)
- 1 large egg, room temperature
- 240 g warm milk (1 cup, 38–41°C / 100–105°F) — or 200 g milk + 40 g water
- 56 g unsalted butter (4 tbsp), very soft
Coconut sauce ingredients:
- 400 ml full-fat coconut milk (1 standard can)
- 120 g water or milk (1/2 cup) — water for cleaner flavor, milk for more caramel browning
- 100–130 g sugar (1/2 to 2/3 cup), to taste
- 1/4 tsp fine salt
- 1 tsp vanilla extract
Optional finish:
- 1 egg beaten with 1 tbsp milk (for a light egg wash)
- 1–2 tbsp desiccated coconut for a light sprinkle on top
Make the dough:
- Mix dry ingredients. In the bowl of a stand mixer, whisk together the flours, yeast, sugar, and salt. If mixing by hand, use a large bowl and a sturdy spoon.
- Add wet ingredients. Beat the egg lightly, then add it and the warm milk to the bowl. Mix on low until a shaggy dough forms.
- Knead. With a dough hook, knead on medium-low for 3–4 minutes. Add the softened butter, a few pieces at a time. Continue kneading 6–8 minutes more until the dough is smooth, elastic, and clears the sides of the bowl. It should still feel slightly tacky. By hand, plan on 12–15 minutes of rhythmic kneading, adding the butter gradually. You’re aiming for a soft, refined dough that almost shows a windowpane when stretched.
- First rise. Shape the dough into a ball, place it in a lightly oiled bowl, cover, and let rise until doubled, 60–90 minutes depending on room temperature. In tropical heat, it can be faster; in a cool kitchen, be patient.
Shape the rolls: 5) Prepare the pan. Lightly grease a 9 x 13-inch pan. If you like, line the bottom with a piece of banana leaf or baking parchment. 6) Divide and shape. Turn the dough onto a lightly floured surface. Weigh it and divide into 12 equal pieces (about 55–60 g each). Shape each piece into a tight ball by tucking edges under and rolling against the counter until smooth. Arrange in 3 rows of 4 in the pan, leaving minimal gaps; they’ll nestle together as they proof. 7) Second rise. Cover loosely and let rise until puffy and touching, 35–55 minutes. When gently pressed, a roll should spring back slowly, leaving a slight impression.
Make the sauce and bake: 8) Preheat oven to 190°C (375°F) with a rack in the center. 9) Whisk the sauce. In a bowl or measuring jug, whisk together coconut milk, water or milk, sugar, salt, and vanilla until the sugar dissolves. Taste; it should be sweet but not cloying. Coconut milks vary—adjust sugar to your preference. 10) Optional egg wash. For deeper browning on the tops, lightly brush the rolls with a thin coat of egg wash. 11) Pour and bake. Gently pour the coconut sauce around the rolls, a little over the tops too. The liquid should come about halfway up the sides of the rolls. Slide the pan into the oven and bake 25–30 minutes, rotating once for even color. The tops should be golden and shiny; the sauce will bubble thickly around the edges. 12) Finish. Let the pan rest 10 minutes so the sauce settles. If you like, baste the tops with some of the thickened sauce. The bottoms should be glossy and pudding-soft, the tops tender and lightly crisp.
Serve warm, with extra sauce spooned over. A cup of koko Samoa—hot, rustic Samoan cocoa—beside a panipopo makes the coconut sing.
Tips inside the method:
- If the tops brown too quickly but the center still looks pale, tent the pan loosely with foil for the last 10 minutes.
- The internal temperature of the center roll should be around 93°C (200°F), but because the sauce steams and bathes the buns, visual cues and spring-back are more reliable.
- For maximum pillowy interior, don’t add too much flour during shaping. Keep the dough soft and lively.
Texture secrets: how to bake buns that float on coconut and spring back on the plate
Panipopo asks for a delicate balance. You want enough gluten structure to hold shape and trap gas, so the buns rise like soft little domes, but not so much strength that they resist soaking up the sauce. The keys:
- Hydration: This dough is moderately hydrated; the milk and egg tenderize, and the butter lubricates the gluten. If the dough feels stiff, add a teaspoon of milk at a time until it softens.
- Proper kneading: Knead until the dough is smooth and slightly elastic. Under-knead and your crumb will be coarse and dull; over-knead and you might make a tight bun that doesn’t absorb sauce well.
- Proofing: The second rise is everything. Rolls should be full of air but not on the brink of collapse. The poke test is your friend: a gentle indentation should slowly spring back. If it springs back too fast, proof longer. If it doesn’t spring back at all, you’ve over-proofed—bake immediately and be gentle when pouring the sauce.
- Fat choice: Butter gives a plush crumb and wonderful aroma; coconut oil gives a subtler, cleaner fat profile that lets coconut flavor dominate. A mix often yields the best texture and aroma.
Sauce chemistry: from sweet milk to silky custard at the bottom of the pan
Coconut milk is an emulsion of fat and water. As it bakes with sugar, heat drives off water and concentrates fat and sugars. There’s less Maillard browning available in coconut milk compared to dairy because coconut lacks lactose and proteins; that’s why some cooks add dairy milk to the sauce or give the buns a light egg wash to encourage color.
- Sugar’s role: Sugar raises the boiling point of the sauce and encourages a syrupy sheen. Too much sugar and your sauce can thicken to the point of candy when cooled; too little and it stays watery. The range in the recipe gives you freedom: at 100 g sugar, the result is lightly sweet; at 130 g, the bottom has a dessert-like richness.
- Salt’s role: A small pinch wakes up coconut’s inherent nuttiness. Don’t skip it.
- Vanilla: It rounds out the coconut flavor and floats above the steam when you lift the lid. Almond extract, used sparingly, gives a bakery-note familiar in Polynesian sweets; a drop too many can dominate.
Comparing methods: the sugar syrup, the condensed milk, and the all-coconut versions
- Classic sugar-and-coconut milk: Clean coconut flavor, balanced sweetness. This is the everyday panipopo I encountered most often in Samoa—simple, fragrant, and not overly heavy.
- Condensed milk addition: Swap some of the sugar and liquid with sweetened condensed milk (for example, 3/4 cup coconut milk + 1/2 cup condensed milk + 1/4 cup water). The result is glossier and sweeter, with a richer, pudding-like sauce. It’s popular in diaspora kitchens and potlucks where a dessert-leaning version is preferred.
- All-coconut cream (fresh): If you can press fresh coconut cream, the sauce becomes silkier and more perfumed. It’s a special-occasion finish that feels like island sunshine trapped in a spoon.
Choose based on the moment. Sunday afternoon with leftovers and cups of tea? Classic sugar-and-coconut. Graduation picnic where dessert competes with cake? Condensed milk. A family reunion where the umu is already smoking? Fresh coconut cream all the way.
Baking panipopo in an umu or a modern oven
Modern ovens give reliable, even heat. Preheat, bake, rotate, done. The umu is a living heat—banked stones, banana leaves, and smoke threading through everything. If you’re lucky enough to bake panipopo in an umu:
- Use a sturdy metal pan, lined with banana leaf to buffer the direct heat and lend subtle fragrance.
- Proof the buns away from the umu’s heat; over-proofing happens fast in tropical air.
- The pan sits on a base of hot stones, covered with leaves and sacking; baking times vary but are typically shorter than a household oven once the umu is roaring. Start checking at 18–20 minutes.
- Expect a faint smoky note and a different kind of browning—more from radiant heat and less from controlled convection. The sauce may bubble more vigorously; remove when a knife inserted between buns shows thickened sauce clinging to the blade.
Story time: a Sunday plate in Vaitele
In a home in Vaitele, after church, everyone drifted toward the table like leaves catching a tide. There were bowls of sapasui, piles of chop bones lacquered with marinade, palusami parcels opening like green gifts. The panipopo came last, tin foil peeled back to release a cloud of coconut-scented steam. A cousin lifted a bun, and it slid free, lacquered underneath like flan, the top glowing a soft gold. He split it, stuffed it with a shard of roast pig and a smear of palusami, and grinned like he’d broken a rule. That was the bite that taught me panipopo is more than dessert or bread. It’s glue. It’s the soft hinge between savory and sweet, between present and memory, between today’s meal and grandmother’s hands.
Common mistakes and how to fix them
- Dry, bready buns: Usually from too much flour or over-baking. Keep the dough soft; trust a lightly tacky feel. Bake until golden but not dark; the sauce should still be fluid around the edges when you pull the pan.
- Sauce too thin: Increase sugar by a tablespoon or two, or bake 3–5 minutes longer. Make sure you whisked the coconut milk thoroughly; separated coconut water yields a watery sauce.
- Sauce curdled or greasy: This can happen if the sauce was aggressively boiling before the buns set or if the coconut milk brand is unstable under heat. Reduce oven temperature slightly and avoid thin, low-fat coconut milks.
- Pale tops: Brush a light egg wash, or replace a portion of sauce liquid with dairy milk to encourage browning. A quick final 1–2 minute broil can add color—watch like a hawk.
- Collapsed buns: Over-proofing or rough handling when adding sauce. Proof until puffy, not floppy, and pour the sauce gently.
- Not coconutty enough: Add a bit more coconut milk in place of water, bump the salt by a pinch, and use full-fat, reputable brands. You can also fold a tablespoon of finely shredded coconut into the sauce.
Ingredient spotlight: choosing coconut milk and flour like a pro
Coconut milk varies widely by brand and batch. Look for short ingredient lists: coconut extract and water, maybe a stabilizer like guar gum. If the can feels like a solid block when you shake it, that’s often a good sign of generous coconut solids. Warm the can under hot water for a minute, then shake before opening.
For flour, consider your climate. In humid tropical weather, flour naturally picks up moisture—your dough may require less liquid than in a dry, cool place. If you live at altitude, the dough can rise fast; keep an eye on the proofing. A digital scale helps you land consistent results despite these variables. A 420 g to 450 g flour target for a dozen buns is a sweet spot; adjust hydration by feel rather than chasing exact cup measures.
Variations that honor the spirit without losing the soul
- Pandan panipopo: Add 1/2 tsp pandan paste to the sauce for a grassy-vanilla perfume and a delicate green hue.
- Brown sugar and cardamom: Swap half the white sugar for light brown sugar and add 1/4 tsp ground cardamom to the dough. The spice’s citrus-pine note flatters coconut.
- Pineapple accent: Stir 1/2 cup very well-drained crushed pineapple into the sauce for a playful, tropical dessert leaning version. Expect a looser sauce and caramelized edges where sugars gather.
- Coconut-on-coconut: Brush the tops with coconut oil, sprinkle a teaspoon of desiccated coconut over the pan before baking, and finish with a few extra flakes after.
Use variations sparingly for your first attempt. Bake the classic once, then riff.
Serving ideas: breakfast, dessert, and everything in between
- With koko Samoa: This rustic cacao drink is deeply aromatic and slightly bitter. The warm chocolate notes make the coconut taste rounder and sweeter. Dunking is not mandatory, but it’s highly endorsed.
- As a sweet-savory sandwich: Split a warm bun and sandwich leftover BBQ pork, a spoonful of sapasui, or even a slice of salty cheese. The contrast is outrageously good.
- With fresh fruit: Papaya squeezed with lime, slices of mango, banana with a dusting of sugar—simple, bright counterpoints to the rich buns.
- As dessert: Chill leftovers and serve cold with a spoon of the thickened sauce, or warm briefly in the oven and top with a dollop of lightly sweetened whipped cream and toasted coconut.
Make-ahead and scaling for gatherings
- Overnight proof: Mix and knead the dough in the evening, shape into rolls, and place in the pan. Cover and refrigerate overnight. In the morning, let them sit at room temperature 45–60 minutes until puffy, then pour the sauce and bake.
- Partial bake and reheat: Bake until pale gold and just set (20–22 minutes), cool, cover, and refrigerate up to a day. Reheat at 175°C (350°F) for 10–12 minutes, basting with extra warmed coconut sauce to refresh.
- Freezing: Freeze baked and cooled rolls (without sauce) in a sealed bag for up to a month. Thaw, arrange in a pan, pour freshly made sauce, and bake 10–12 minutes at 175°C (350°F) to warm through and thicken the sauce.
- Double or triple: For large gatherings, use multiple pans rather than one oversized vessel. More surface area means more buns touching the sauce—everyone wins.
Tools that make the process easier (but not mandatory)
- Stand mixer with dough hook: Saves energy, especially for enriched doughs.
- Digital scale: Ensures consistent dough hydration and even portioning.
- 9 x 13-inch metal baking pan: Metal conducts heat better than glass for this recipe, giving warmer bottoms and a more reliable sauce set.
- Pastry brush: For egg wash or a gloss of sauce.
- Bench scraper: For clean cuts and shaping.
If you have none of these, you still have hands and a bowl. Panipopo can be rustic and beautiful without gadgets.
Timing roadmap: a baker’s schedule you can follow

- 0:00 Mix and knead dough (15 minutes)
- 0:15 First rise (60–90 minutes)
- 1:15 Shape rolls (15 minutes)
- 1:30 Second rise (35–55 minutes)
- 2:15 Preheat oven and whisk sauce (10 minutes)
- 2:25 Pour sauce, bake (25–30 minutes)
- 2:55 Rest and serve (10 minutes)
Total active time: about 45 minutes. Total elapsed time: roughly 3 hours.
A note on language and respect
Food is one vocabulary of fa’a Samoa, the Samoan way. To’ona’i is the Sunday meal, an anchor of family and faith. Names matter: oka i’a for the lime-kissed raw fish salad; palusami for taro leaves baked with coconut cream; sapasui for the ubiquitous, delicious Samoan chop suey. Coconut cream may be called pe’epe’e or sua popo, and some households casually say lolo as a Polynesian shorthand. Spellings vary in English; love of the dish doesn’t.
When you cook panipopo, you’re not just baking. You’re participating in a conversation across kitchens—from a fale in Safotu to a church hall in Otara to a small apartment stove where the oven light is a campfire’s stand-in and a pan of buns can make a roomful of guests feel like they share a surname.
Frequently asked nuances from readers

- Can I use only coconut milk in the dough? You can replace up to half of the milk with coconut milk. Expect a slightly denser crumb; coconut fat coats gluten strands and slows development.
- Can I use coconut sugar? Yes, but it’s less sweet by weight and has a deeper molasses taste; increase by about 10–15% and expect a darker sauce.
- Is there a dairy-free version? Absolutely. Use water instead of milk in both dough and sauce, and swap butter for refined coconut oil. Egg-free versions are possible too; the crumb will be slightly less enriched but still lovely.
- How do I keep the bottoms from over-browning? Use a light-colored metal pan, line with parchment or banana leaf, and avoid placing the pan directly on a stone or the lowest rack.
- How do I scale up for a taligatā (big feast)? Stagger the proofing by starting one batch 30 minutes earlier, so you can rotate pans through the oven without bottlenecks.
Sensory cues to bake by

- Sight: The rolls should be visibly touching, with a gentle crown. The sauce bubbles actively at the edges but isn’t rolling like a boil-over.
- Smell: The kitchen smells like warm sugar and coconut, with a faint toasty edge. That scent intensifies in the last 5 minutes—your cue that the tops are coloring.
- Sound: When you pull the pan, the sauce murmurs; as it settles, the bubbles hush. Quiet is a good sign the sauce has thickened.
- Touch: A bun top should spring back like a gentle cushion. The bottom will be slick but not watery; sauce trails behind your finger in a ribbon rather than a drip.
If you want to go deeper: tangzhong and sourdough approaches
- Tangzhong method: Cook 1 part flour to 5 parts liquid into a paste (for example, 25 g flour + 125 g milk) until thick, cool, and add to the dough. This gelatinizes starches and gives exceptional softness and shelf life. Reduce the remaining flour and liquid slightly to compensate.
- Sourdough panipopo: Replace yeast with 150 g active 100% hydration starter, reduce milk by 75 g, and extend bulk fermentation until doubled (3–5 hours depending on temperature). Flavor deepens, crumb stays tender if you resist the temptation to over-ferment. Bake as usual, but be cautious: sourdough acidity can slightly tighten gluten; keep fat moderate.
A final plate
I think panipopo persuades by aroma first, by texture second. It promises comfort before you see it. Maybe that’s why it threads itself through so many Samoan memories: it’s comfort in a pan, generous by design, meant to be torn and shared. When I lift a roll and feel the heat on my fingertips, hear the faint sigh as the custardy bottom releases, and taste that mingling of sweet coconut and warm bread, I think of the laughter that travels across tables and the way a dish can carry a place into another place, intact.
Bake these buns. Bring them to your next to’ona’i, your next potluck, your next weary Tuesday night. Let the coconut perfume your kitchen. Watch the pan go quiet, then clean. Smile when someone asks for the recipe and scribble it on the back of the foil you used to cover the pan. That, too, is part of panipopo’s story: learned in one kitchen, carried to the next, remembered by heart, and baked until it smells like home.