A Guide to Chilean Empanada Dough Perfection
9 min read Discover the secrets to crafting authentic Chilean empanada dough, blending tradition, technique, and flavor for the perfect bite every time. June 06, 2025 03:00
A Guide to Chilean Empanada Dough Perfection
Introduction: The Heart of Chilean Comfort Food
Imagine walking through the vibrant streets of Santiago on a chilly morning, the aroma of freshly baked empanadas wafting through the air, wrapping you in a warm embrace. Chilean empanadas are more than just savory pastries; they are a cultural emblem, a culinary tradition passed down through generations, each bite echoing stories of family gatherings, festivals, and local pride.
The secret to a truly authentic Chilean empanada lies not only in the filling but fundamentally in the dough — its texture, flavor, and craftsmanship. A perfect empanada dough is an art form, blending history, technique, and a touch of personal flair. This guide will take you on a journey through the nuances of mastering Chilean empanada dough, so you can recreate these delicious pockets of history in your own kitchen.
The Cultural Significance of Empanadas in Chile
Empanadas in Chile are more than a snack; they are a cultural staple, integral to national identity. Traditionally enjoyed during Día de las Glorias Navales(Naval Glories Day),Independence Day, and family gatherings, these pastries symbolize resilience, community, and culinary ingenuity.
Chilean empanadas have regional variations, but the most iconic are the empanadas de pino — filled with a savory mixture of ground beef, onions, olives, raisins, and a hard-boiled egg. The dough forms the canvas for this flavorful filling, encapsulating it in a golden, flaky exterior.
Historical Roots and Regional Influences
Tracing back to Spanish and indigenous influences, the Chilean empanada evolved from medieval European pastries and indigenous corn-based breads. Over centuries, the dough adapted to local ingredients, climate, and tastes.
In the arid north, empanadas are often baked, with a thicker, bread-like dough that can withstand the heat. In contrast, the southern regions favor fried empanadas with a lighter, crisper crust. These regional distinctions highlight the diversity and adaptability of the dough recipe, rooted in tradition but flexible enough to reflect local flavors.
The Foundation: Ingredients for Chilean Empanada Dough
Creating an authentic Chilean empanada dough begins with selecting high-quality ingredients that balance flavor, texture, and workability.
1. Flour
The backbone of your dough, typically all-purpose wheat flour, provides the structure. For a more tender crust, some cooks blend a portion of fine cornmeal or add a touch of semolina.
2. Fat
Traditionally, lardis preferred for its rich flavor and flaky texture, butbutterorvegetable shortening are common alternatives, especially for a slightly lighter crust. The fat is crucial for creating layers and a tender crumb.
3. Liquid
Warm wateris essential for binding the dough, but some recipes incorporatemilk for added richness. The temperature influences the dough’s elasticity.
4. Seasonings
A pinch of saltenhances flavor, and some recipes include a dash ofvinegarorlemon juice to improve elasticity and preserve moisture.
5. Additional Ingredients
Some cooks add a small amount of egg for strength and richness, especially if the dough will be used for frying.
Step-by-Step: Crafting the Perfect Chilean Empanada Dough
1. Mixing the Dry Ingredients
Begin by sifting flourandsalt together into a large mixing bowl. Sifting ensures even distribution and prevents lumps.
2. Incorporating the Fat
Cut lard, butter, or shortening into small cubes and add to the dry mixture. Use a pastry cutter or your fingertips to work the fat into the flour until the mixture resembles coarse crumbs. This step is vital for achieving flakiness.
3. Adding Liquid
Create a well in the center of your mixture and gradually pour in warm water (or a mix of water and milk). Mix gently with a fork or your fingers, just until the dough begins to come together. Be careful not to overmix; a tender crust is the goal.
4. Kneading and Resting
Turn the dough onto a lightly floured surface and knead briefly — about 2-3 minutes — until smooth. Wrap in plastic wrap and let rest for at least 30 minutes. Resting relaxes the gluten, making the dough easier to roll out and improving texture.
5. Rolling Out
Divide the dough into manageable portions. Using a rolling pin, roll each piece into a thin circle, about 1/8 inch thick. Keep the surface lightly floured to prevent sticking.
6. Cutting and Filling
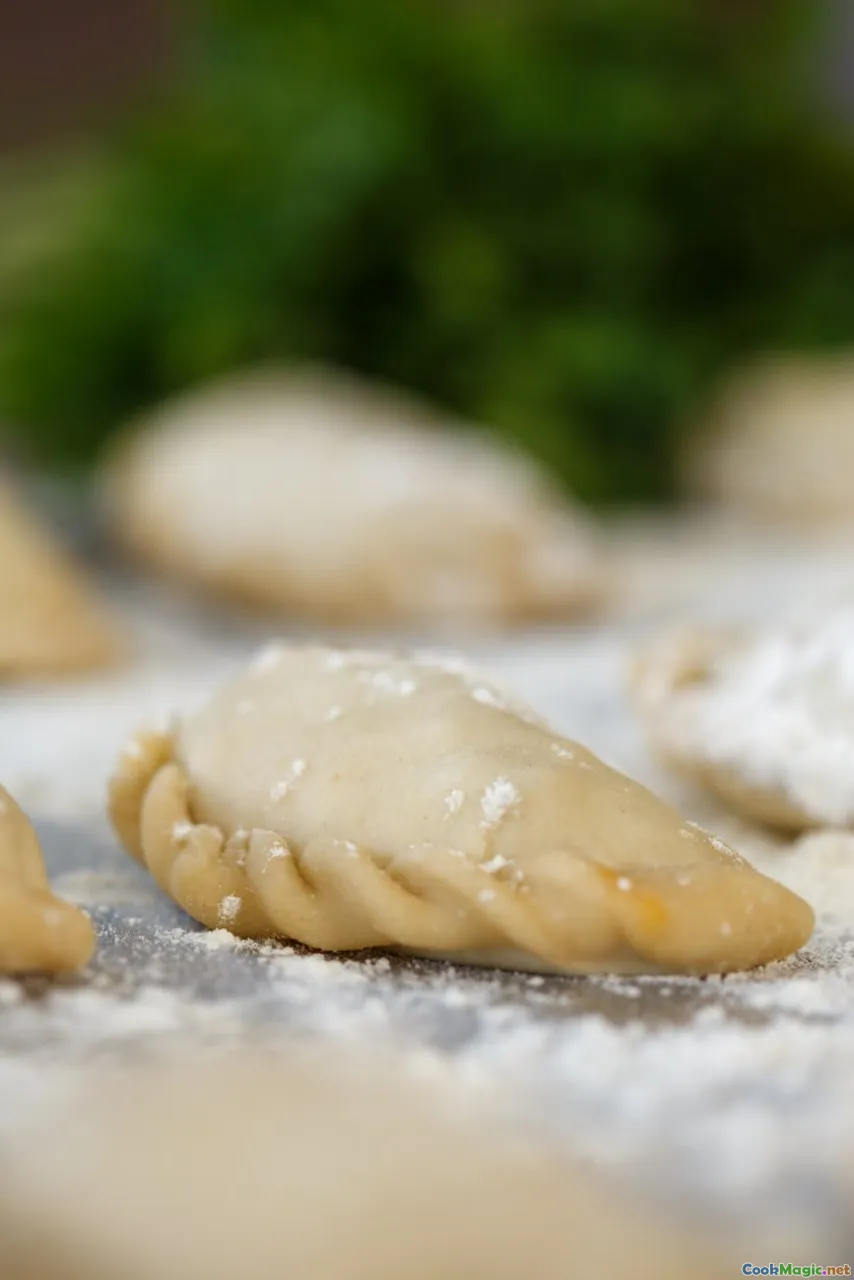
Cut out circles using a large cutter or a bowl. Fill with your prepared pino filling, then fold and crimp the edges to seal. For a traditional look, crimp with a fork or pinch with fingers.
7. Baking or Frying
Traditionally, empanadas are baked at 200°C (392°F) until golden, about 20-25 minutes. Alternatively, fry in hot oil until crispy and golden.
Tips and Tricks for Empanada Dough Mastery
- Use Cold Fat: Keep your fat cold to create flaky layers.
- Do Not Overwork: Overkneading develops gluten, resulting in a tough crust.
- Rest is Key: Allow the dough to rest to enhance elasticity and flavor.
- Experiment with Fats: Lard yields the best flaky texture, but butter offers a richer flavor.
- Adapt Thickness: Thinner dough yields a crispier crust, while thicker dough is more bread-like.
Personal Reflections and Variations
In my own culinary journey, mastering the Chilean empanada dough was a revelation. I found that the subtle addition of a teaspoon of vinegar made the crust exceptionally tender, while a blend of half butter and half lard struck the perfect balance between flavor and flakiness.
Regional variations also inspired me — fried empanadas with a lighter, more tender crust for street food stalls, versus baked versions with a sturdier, bread-like texture for family feasts. Each variation tells a story of place, tradition, and personal taste.
Final Thoughts: Crafting Your Own Empanada Heritage
Mastering Chilean empanada dough is more than a cooking technique; it’s an immersion into a rich cultural tapestry. The process invites patience, experimentation, and a love of tradition. Once you’ve achieved that perfect golden crust encasing savory filling, you'll understand why these pastries are cherished across generations.
So roll out your dough, fill it with stories, flavors, and memories, and share the magic of Chilean empanadas with friends and family. In every bite, you'll taste the history, artistry, and passion that make Chilean cuisine truly special.


